
Linking Lottie Animations from Github

If you’ve read my previous article What is a Lottie Animation and Using Lottie Animations through an iFrame, you should now consider separating the Lottie animation file from the html file that presents it. This will enable you to improve loading and, if using Github, enable easier maintenance and updatability.
The below article will step you through how to use a free account on Github to store and maintain all your Lottie animations. Note, the article is written primarily for non-technical users who build projects through content management systems and authoring tools.
The benefits of Github
Github is a platform that millions of developers worldwide use to store their projects. It allows them to easily manage changes to files across team members and much more. For the purpose of this article, however, we don’t need to understand it very deeply, you can just know that it has a very generous free tier that let’s you create as many public or private repositories of files as you like, and we will use this ability to create a space to store our Lottie animations.
In order to start, create an account at github.com.

1. Prepare your file
Before you start the below steps, you should have a Lottie animation ready. You can download one from LottieFiles.com or create one yourself in After Effects.

2. Create a repository
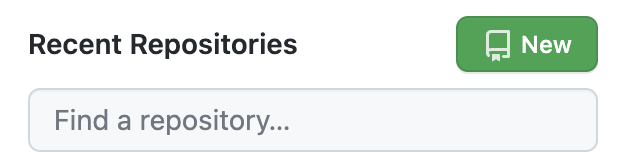
Once logged into your Github account, click New to create a new repository. Either from the Recent repositories list or the plus dropdown next to your profile image at the top right.
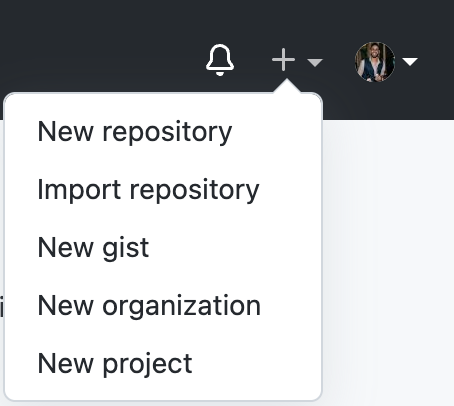
Click “New repository”
A repository is a space for us to upload files. We should create a new repository for each project we do so that we can organise the sets of files separately.
In the Create a new repository screen, give your repository a name and description, then select private, and click create repository.
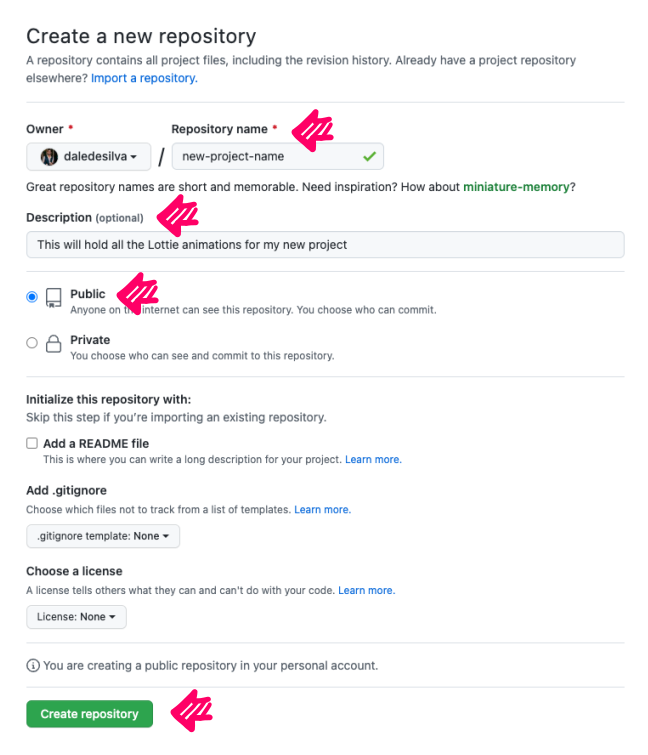
Making your project public means that anyone on the internet can find your Github repository and look at the files within it, however, it’s the only way this works without prohibitive complexity.
Public Github repos are utilised a lot by developers for open source projects or their folios, but you’ll have to make a decisions as to whether this is an issue for you.
3. Upload your files
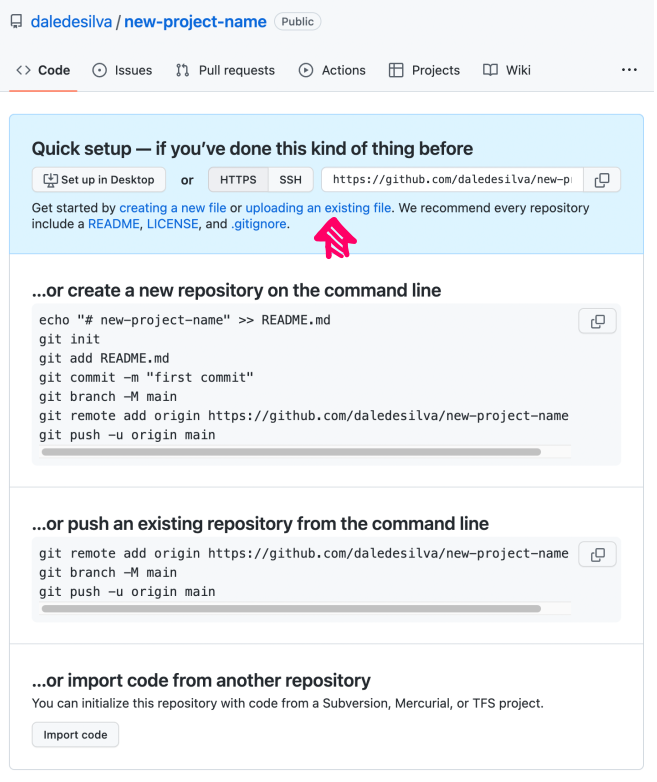
The next screen you see will look something like the below. It’s full of technical setup instructions for developers that are using it for larger projects. We’re just uploading a few files though, so we can just click the upload an existing file link.
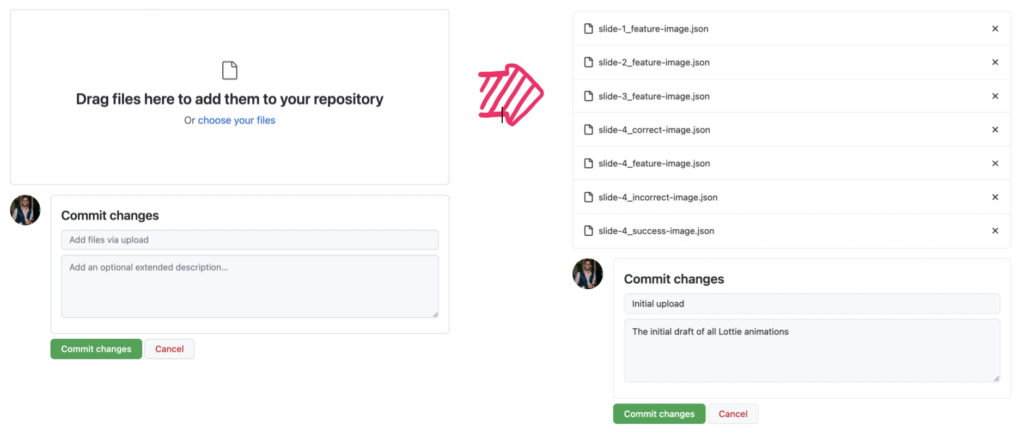
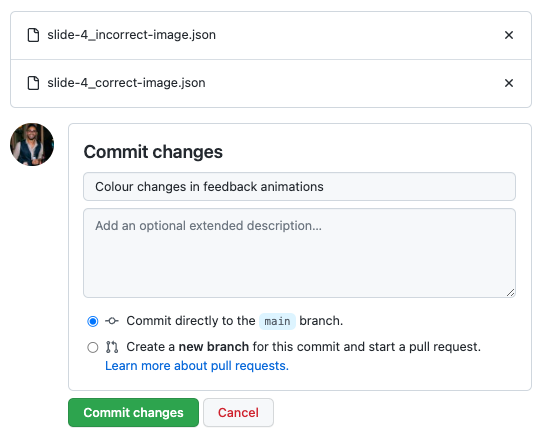
You’ll then get a screen to drag and drop you files. In the screenshots below, you’ll see that I’ve uploaded some of the Lottie animations I want to store. But before that’s saved, I need to give this upload a name and description and click Commit changes.
4. Link to each file
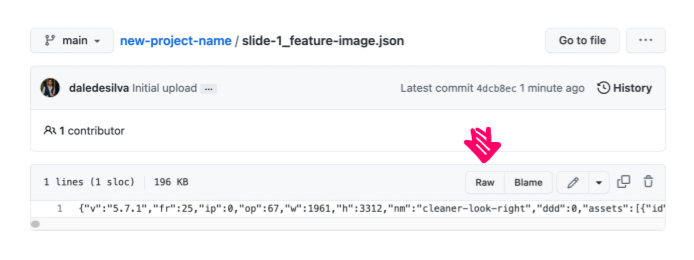
Once the files are uploaded, you can then click on each file and click on the Raw button to view the file directly (Rather than a Github summary of the file.
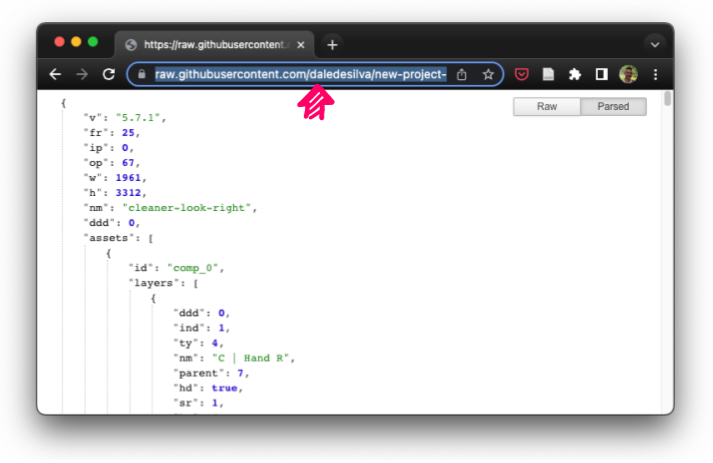
The file will just look like code, but while it’s open, you can now copy the URL from the browsers URL bar. This is the URL you can use to link your file to your Lottie (See my article Using Lottie Animations Through iFrames).
Do that to set up each Lottie Animation and they’ll now work as usual – but they’ll be stored on Github.
5. Modify your file (optional)
Once you’ve uploaded your files and successfully linked to them, you’re good to go, however, another benefit to storing your Lottie files on Github is that you can update them at any time without having to republish the main project or projects that link to them.
You might make a change to an animation used on one slide because of a client request, or you might even update a subtle divider or logo animation that you’ve used across 10 different projects. Once the update is committed, all of those projects will automatically use the new file.
It also means that you can split the work across your team. Your designer/developer can continue building out your project, while the animator can update the animations on Github whenever they finish them – and they’ll automatically update in the project.
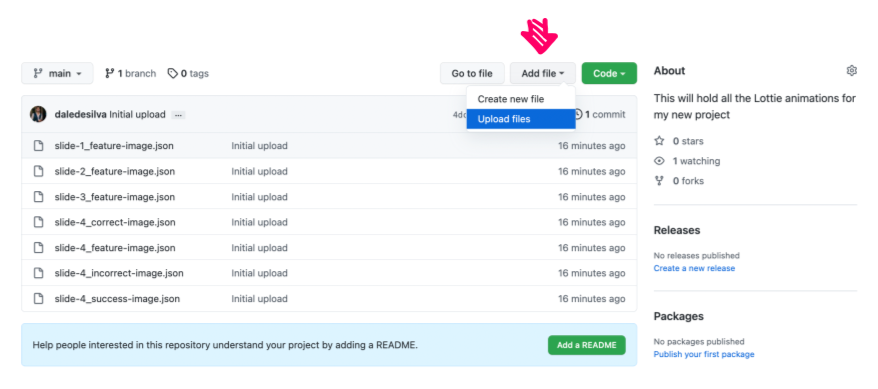
To do this, simply access the repository you want to upload a new version of a file for. Click Add file and then Upload files.
Then be sure to name the commit and click Commit changes. That’s it, the new animations will now be automatically used wherever they were before.
That’s it!
You’ve now learned how to store your Lottie animations on Github. This means you can include them more efficiently in programs like Storyline that allow you to include animations through iFrames, but it also means you can use them anywhere that accepts URLs for Lottie animations.
And don’t forget the benefits that this brings working in teams or updating files later!
Note: While this is a reasonably simple approach (Once you’re used to it), there’s never a guarantee it will work perfectly in every project – Perhaps your client’s server has certain external domains blocked. Always test.

Thanks…
I also dissect and speculate on design and development.
Digging into subtle details and implications, and exploring broad perspectives and potential paradigm shifts.
Check out my conceptual articles on Substack or find my latest below.
You can also find me on Threads, Bluesky, Mastodon, or xTwitter for more diverse posts about ongoing projects.

My latest articles


Leave a Reply